Update DNS records and set up a 301 redirect
- 2 min read
- 3 screenshots
- Updated
On this page
This guide uses mydomaine.com as an example. Make the changes in the dashboard of the provider that manages the domain’s DNS records.
- CNAME. Point
wwwandB2Btofallback.joodcms.com. For each name, replace the old valuefad9a0fbd82d4340.vercel-dns-016.comif that record exists. If the record is missing, add it with the new value. Enter the hostname withouthttps://. Keep the existing TTL or use the default for a new record. - A. Delete the record only if its name is
@and its value is216.150.1.1. - Redirect. Set up a permanent 301 redirect from
mydomaine.comtohttps://www.mydomaine.com.
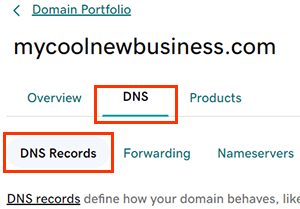
- In Domain Portfolio, select the domain and open DNS → DNS Records.
- Click the pencil to edit the CNAME or Add New Record to add it. Enter the Name and Value, then click Save. Use the delete icon for the matching A record.
- Under Forwarding, select Add Forwarding in the Domain section. Choose https:// in the protocol list, enter
www.mydomaine.com, select Permanent (301), and save.

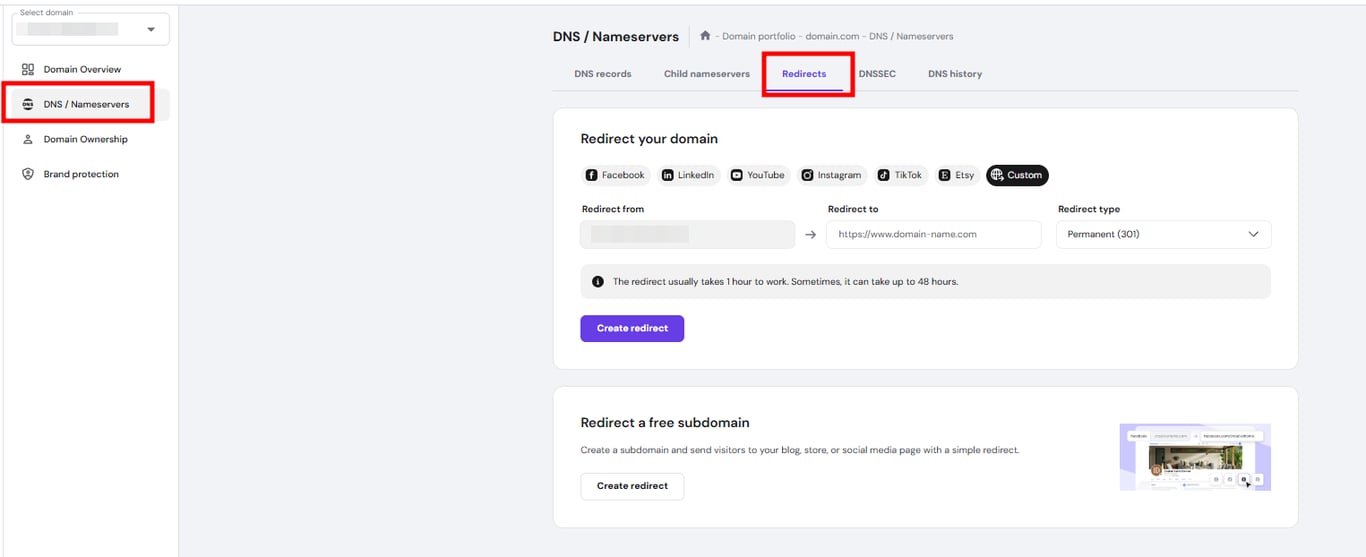
- In hPanel, open Domains → DNS / Nameservers → DNS records for the domain.
- Click the pencil, edit the CNAME, and click Update. To add a record, select CNAME, enter the name and destination, then click Add Record. Use the trash icon for the matching A record.
- In Redirects, enter the full HTTPS destination
https://www.mydomaine.com. Select Permanent (301), then click Create redirect. If the domain is connected to a hosting plan, use the redirect tool in the website dashboard.
Check that both CNAME records point to the new destination. Confirm that https://mydomaine.com redirects to https://www.mydomaine.com.
Was this page helpful?